How to Find and Repair a leak in your kite
Posted by Stephan Krajicek on
Kite bladder leaks seem to be the number one cause of headaches among kiteboarders. In this first blog post about the topic, I will write about common bladder failures and how they can cause your bladder to go soft.
But first, how do you even find a leak in your kite?
Finding a leak
The best way to find a leak in your kite is to pump it up real hard and submerge it in a large pool of water. You will find the leak by looking for small air bubbles coming from a strut. If you do not have access to a large pool of water, you should be able to isolate which struts has the leak by watching which strut goes soft first.
Once you have located which strut the leak is coming from, you will need to remove that individual bladder to repair it. First, prepare a soapy water solution of Water and Dishwasher soap in a spray bottle if possible. A 1:4 ratio of soap to water should be used.

Pump up the bladder just enough to hold it's shape. Don't over inflate! Spray the valves and the bladder with the solution and watch for small bubbles to appear. Very small leaks will require you to rub the solution up and down the bladder in order to be detected.
Mark the location with a permanent marker and depending on the cause of the leak, use the recommended KITEAID product below to repair it!
Type of leak and what KITEAID product you need to repair it.
Pin hole bladder leak
- Pin hole leaks are sometimes the hardest to find, but the easiest to repair. use our Bladder Repair Kit or Pin Hole Repair kit and simply clean and apply a small patch.

Valve Un-gluing / De-laminating
- Remove valve completely with boiling water and re-attach using a Valve Donut or Valve Sealant
- Replace valve with a new self adhesive stick-on type


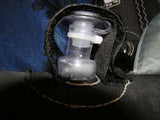
Broken valve stem
- It is best to replace the valve completely with a new self adhesive stick-on type
- If you do not have a new valve, our Valve Sealant will do the trick to save your kite while travelling


Valve cap leaking
- Warm up the valve cap in boiling water and enlarge the hole on the bottom by inserting a drill bit slightly larger than the hole. Cool cap in cold water before removing the ril bit.
- Or, close valve with cap and place a small ziptie/tie wrap over the valve stem snug but not too tight. This should prevent the air to escape from between the stem and the cap
One pump hose leaking
- This is usually caused by a loose ziptie on the hose end
- Hose could have cracked if really old. UV rays tend to be harsh on kite parts.

Hopefully this blog post helped you find and repair your bladder leak! If you have any question please do not hesitate to write to us here.
Share this post
- Tags: bladder reair, how to fix a kite bladder, how to fix a kite valve, how to fix a leak in your kite, kite repair, kite valve repair, Replacement kite Strut Bladders, Valve Repair Kit